
An opt-in page is a dedicated landing page where customers can sign up to receive review invitations from your business. It gives you a compliant way to build your review request list, and customers explicitly consent before you contact them.
Steps to create your opt-in page
Navigate to Opt-In
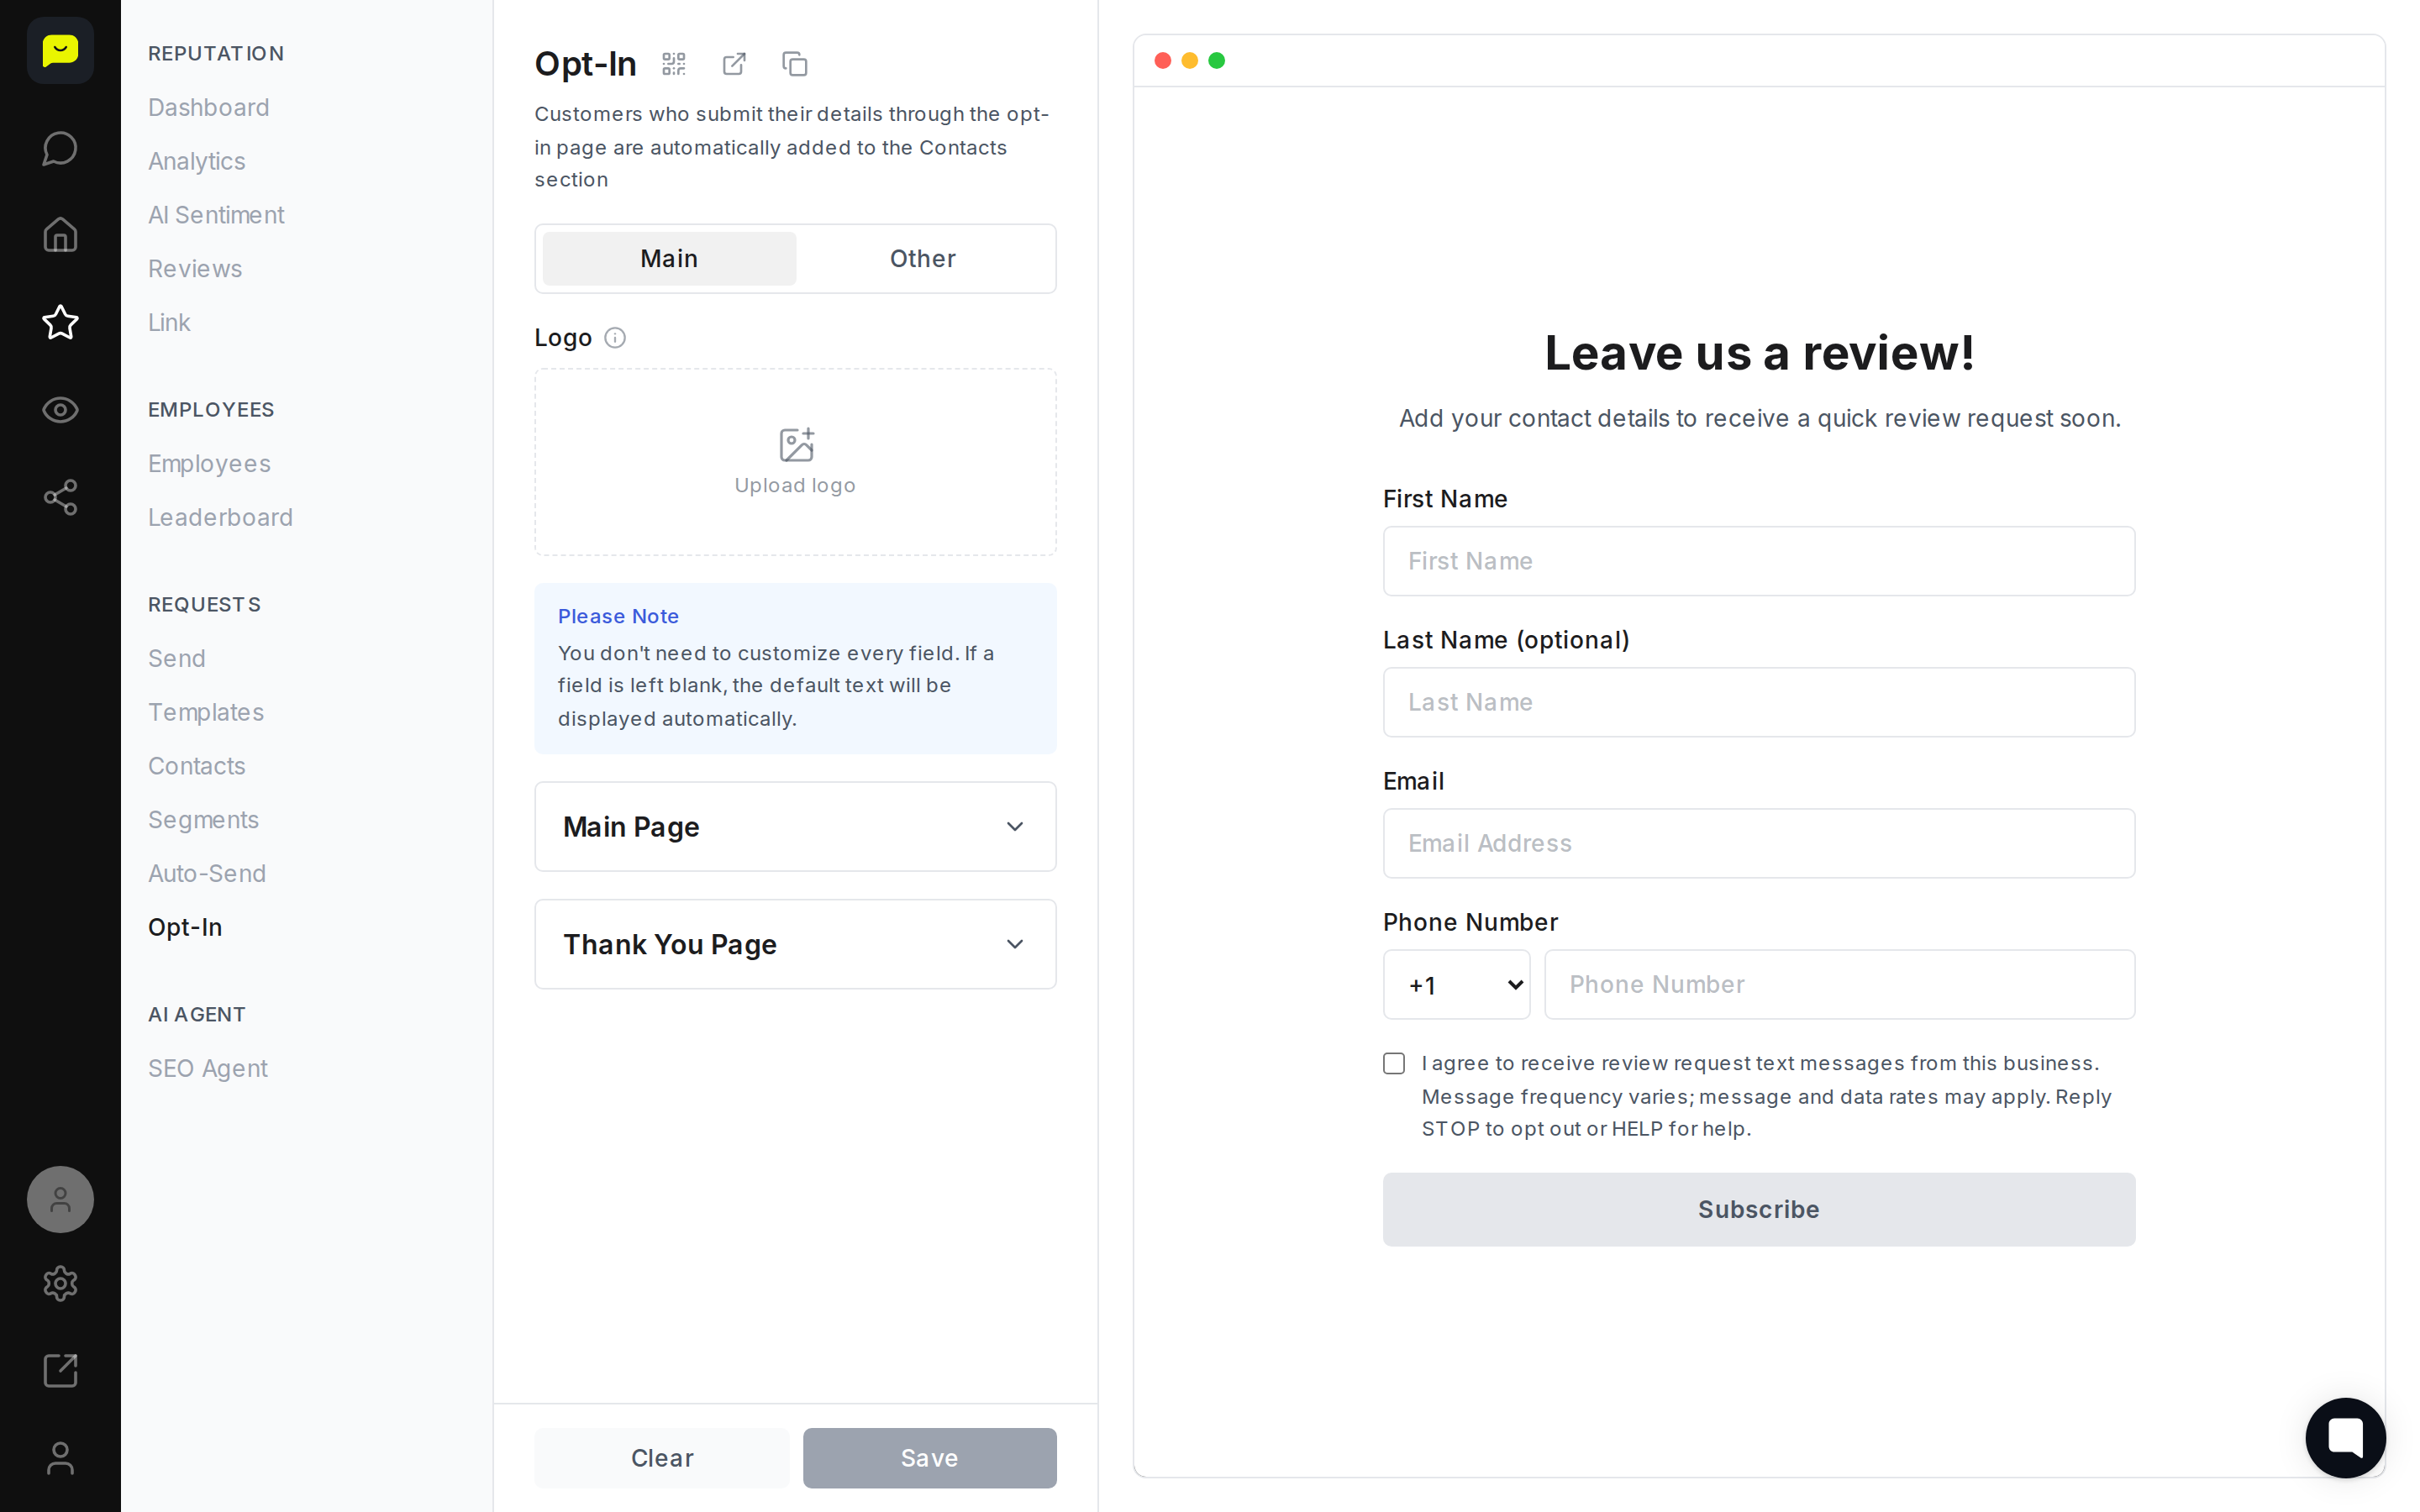
In the left-hand navigation, expand Reputation and select Opt-In under the Requests section. This opens the Opt-In page at /dashboard/reputation/opt-in. At the top you'll find quick-access buttons to generate a QR code, Open your live opt-in page, or Copy link to share it directly.
Upload your business logo
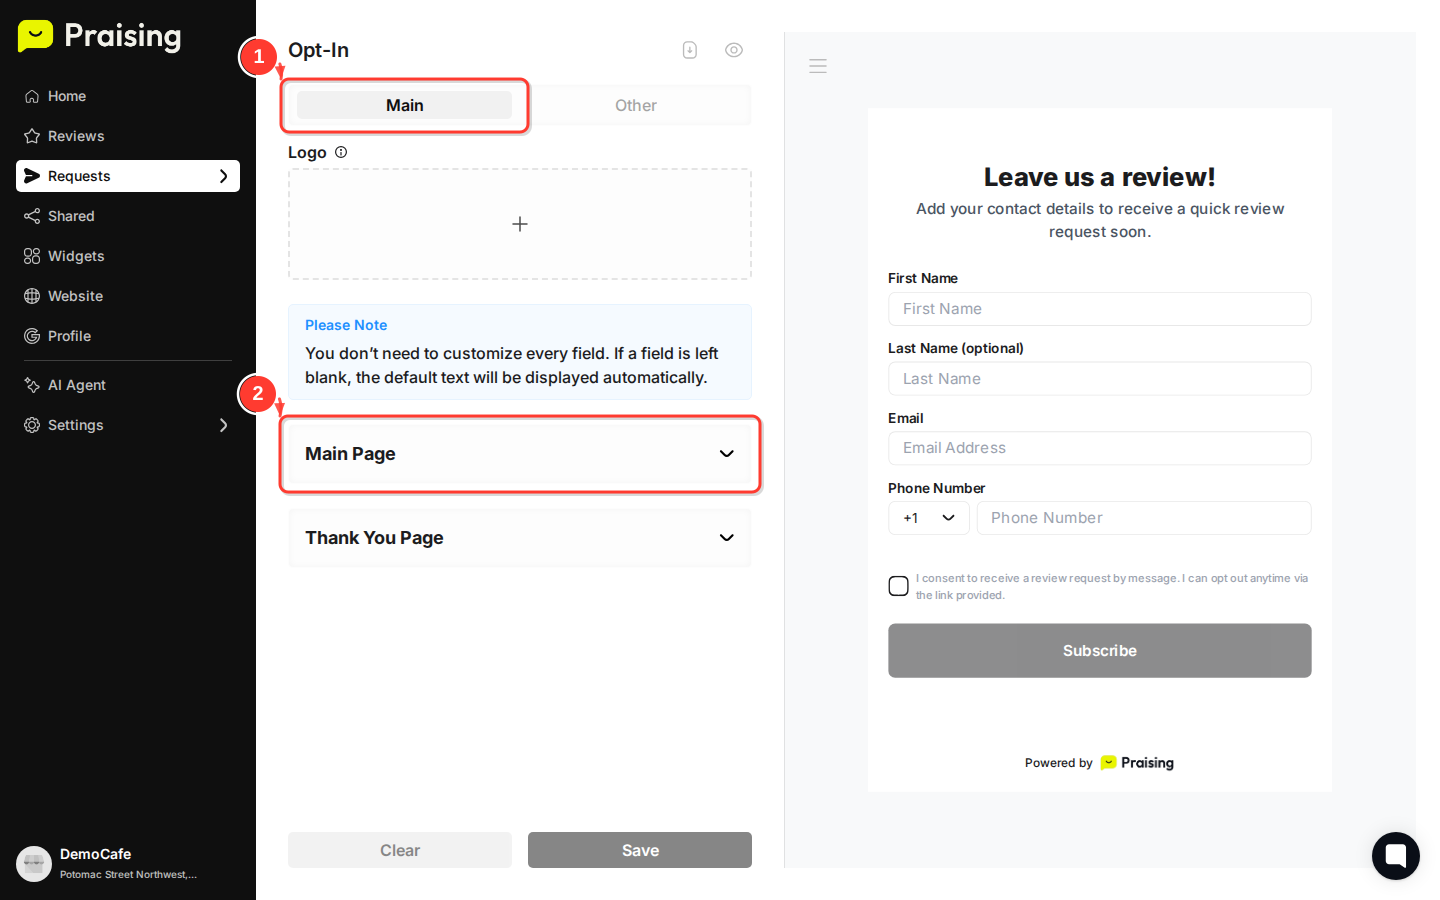
Click Upload logo next to the Logo section. This helps customers recognize your brand when they land on the page.
Customize the main page content
With the Main tab selected (it's active by default), click Main Page to expand the customization options. You can edit the headline, description text, and call-to-action button that customers see when they visit your opt-in page.
Configure the thank you page
Click the Other tab, then click Thank You Page to expand the options customers see after successfully opting in.
Customize thank you page messaging
In the Other tab, personalize the thank you message and any follow-up instructions customers receive after opting in. Use this to set expectations about when they'll hear from you.
Save your opt-in page
Once you've customized both pages, click Save to publish your changes. To discard your edits, click Clear to reset the form.

What's Next?
After creating your opt-in page, you can:
Share the URL through email signatures, social media, or your website
Add the link to receipts or other customer communications
Monitor opt-in rates through your Reputation dashboard
Send review requests to customers who've opted in, they're automatically added to your Contacts section