Your review link is the fastest way to get customers onto your review page — paste it in a text, print it on a receipt, or display it as a QR code on your counter. Everything your customers need to leave a review lives at one shareable URL, and this article walks you through finding it, customizing it, and putting it to work.
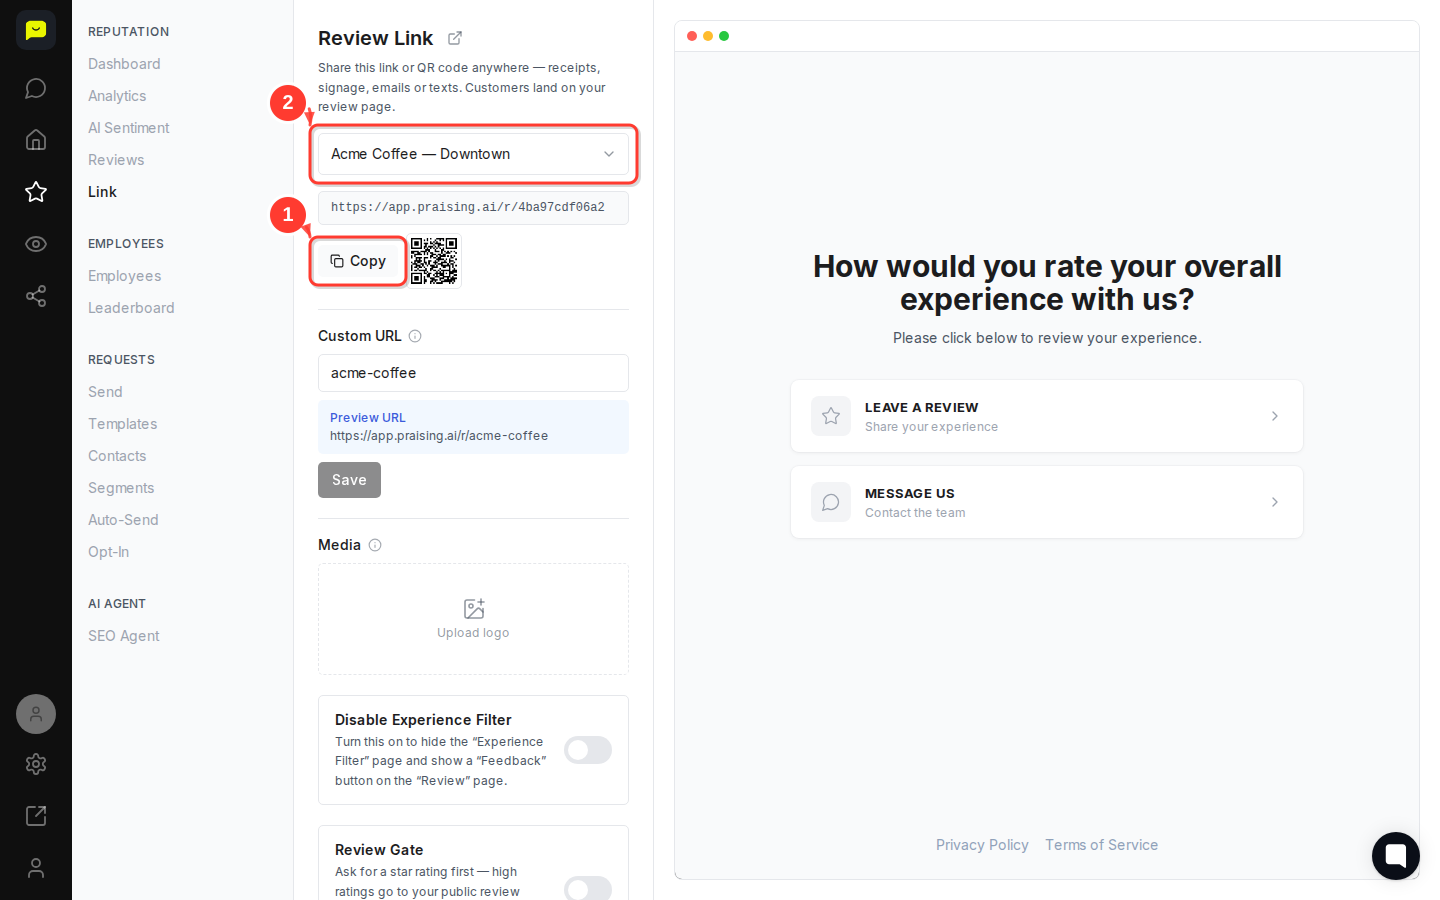
The Review Link page loads with your unique link already generated and ready to share. You'll see the full URL (for example, https://app.praising.ai/r/4ba97cdf06a2) alongside a QR code that points to the same destination.
Click Copy to copy the link to your clipboard, then paste it wherever you need it: a follow-up text, an email footer, your Google Business Profile, or a printed handout.

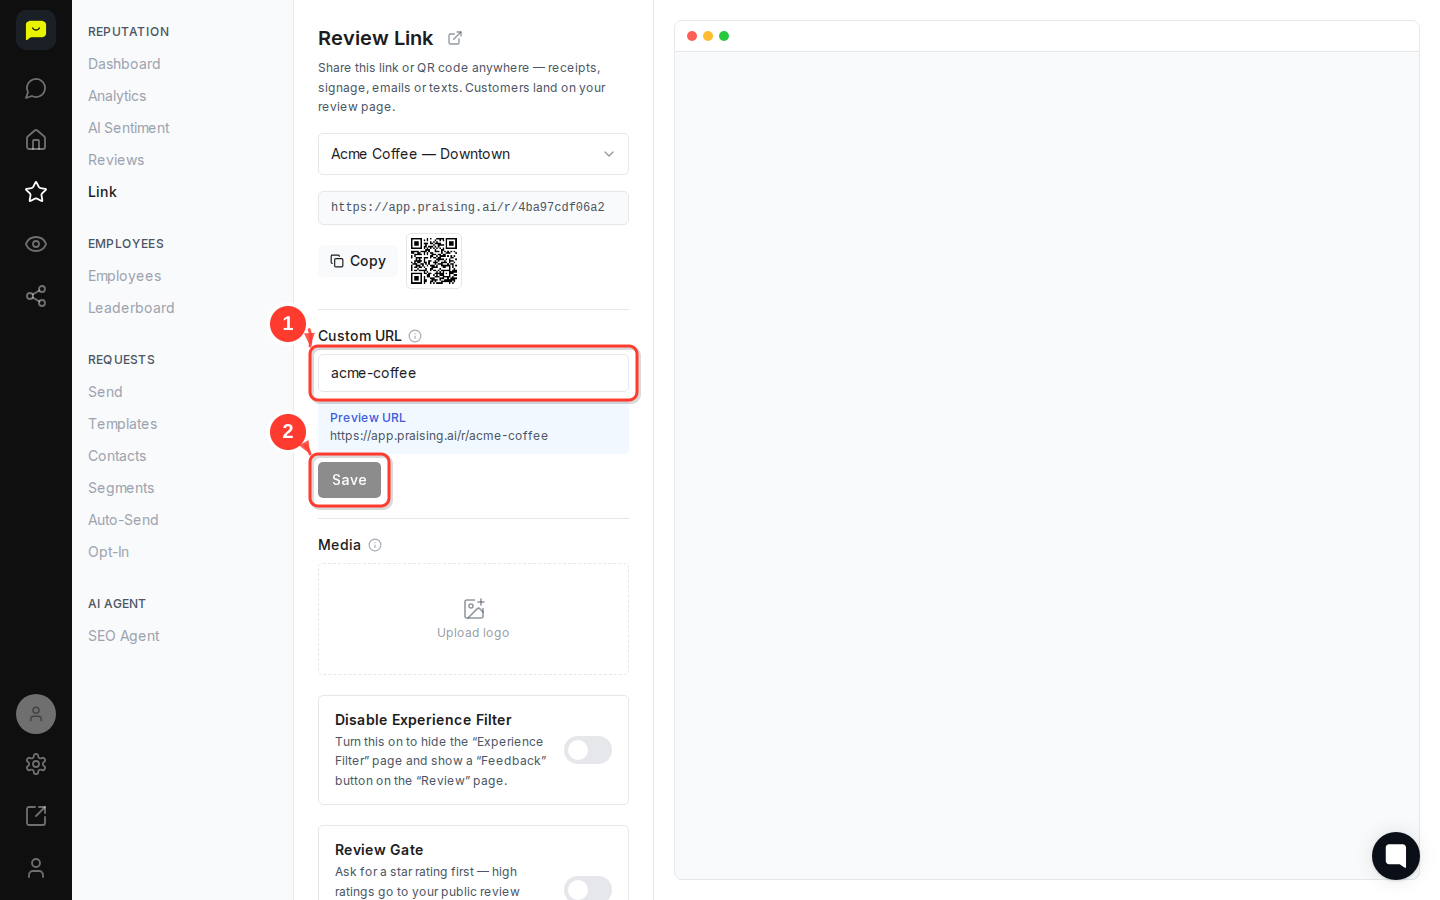
Your default link uses a short random code, but a branded URL is easier to remember and looks more professional in print. Under the Custom URL section, you'll see a text field pre-filled with your current slug (for example, acme-coffee).
Edit the field to match your business name, check the Preview URL line to confirm it reads the way you want, then click Save.
Click Upload logo under the Media section to add your brand mark to the review page. A logo makes the page feel like a natural extension of your business rather than a generic form, which increases the chance customers follow through.
Two toggles let you control what customers experience when they arrive on your review page:
Disable Experience Filter: When switched on, this hides the "Experience Filter" page and replaces it with a "Feedback" button on the review page itself. Turn this on if you want a simpler, single-step flow.
Review Gate: When switched on, customers are asked for a star rating first. High ratings are directed to your public review sites; lower ratings are routed to a private feedback form instead.
Toggle either option based on your preference. Neither setting is required, so leave them off to use the default flow.
Paste your Google review link into the Where reviewers go field. This is where customers land when they tap Leave a review inside your funnel. No Google account connection is required. Praising.ai simply redirects customers to the URL you provide.
Once you've pasted the link, click Save.
If you display your review link in more than one physical location, tracked QR codes let you measure which spots actually drive scans. Scroll down to the Tracked QR codes section and click New to generate a code for each placement, such as your counter, receipts, or table tents. Each code gets its own scan count so you know exactly where your reviews are coming from.
Now that your review link is set up and ready to share, here are a few natural next steps:
[How to send your first review request](https://help.praising.ai/en/articles/69ba5faeb09ad8d3146c8939) — Start proactively inviting customers to leave a review via text or email.
[How to set up Auto-Send for review requests](https://help.praising.ai/en/articles/69bbad6f04e870e55eaef80a) — Automate your review requests so every customer gets an invitation without any manual effort.
[How to create an opt-in page for review collection](https://help.praising.ai/en/articles/69de0408f2b4871d6f395eaf) — Give customers a way to subscribe to review requests directly from your website or storefront.
