Your activity history gives you a complete, timestamped record of every review request sent from your Praising.ai account — whether it was triggered manually, through a campaign, or via Auto-Send. Use it to audit outreach activity, troubleshoot delivery issues, and keep tabs on who's been contacted and when.
Navigate to Settings → History in your Praising.ai account. The page loads with a chronological feed of all activity, most recent at the top. Each row shows the date and time, the recipient's name and email address, and the request type.
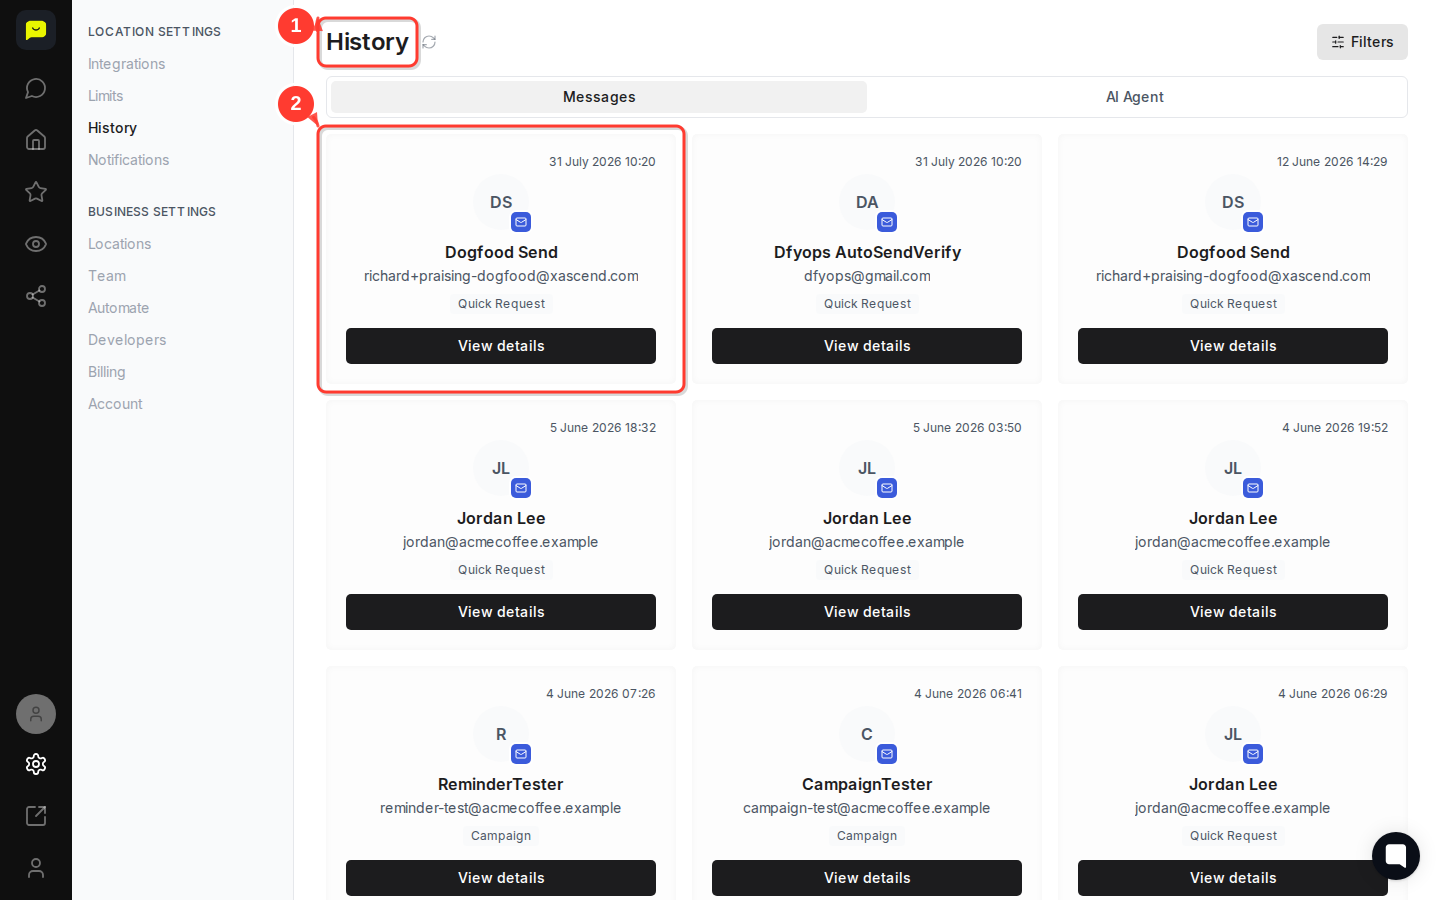
Every row in the history feed contains four pieces of information:
Date and time — the exact moment the message was sent (e.g., 31 July 2026 10:20)
Recipient avatar and name — a lettered avatar alongside the contact's full name (e.g., Jordan Lee)
Email address — the address the request was delivered to (e.g., [email protected])
Request type — either Quick Request (a one-off manual send) or Campaign (triggered by an automated sequence)
Knowing the request type tells you whether a contact was reached through your day-to-day outreach or an automated campaign flow.
At the top of the feed, you'll see two tabs: Messages and AI Agent. The Messages tab is active by default, showing your review request history. Click AI Agent to view a separate log of activity generated by the AI Agent — useful if you want to audit automated responses independently from your outreach messages.
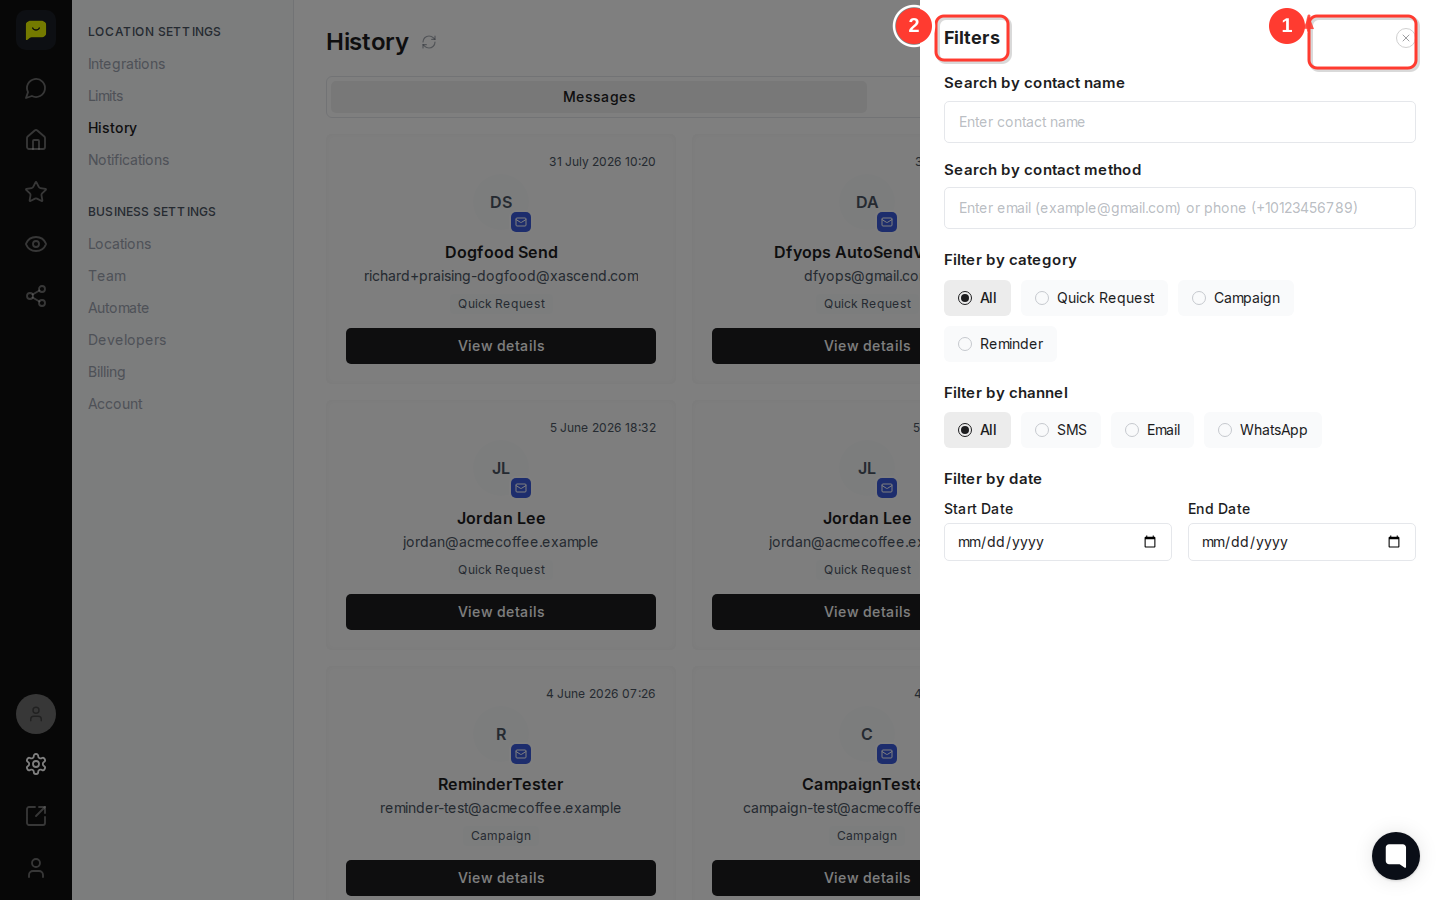
Click the Filters button at the top of the page to narrow down what you see. You can filter by date range, request type, or contact — handy when you're auditing a large volume of activity or investigating a specific send.

Each row has a View details button on the right. Click it to open the full record for that entry, including message content, timing, and delivery status. This lets you verify exactly what was sent and confirm it reached the right person.
Click the Refresh history button (the icon to the right of the "History" heading) to pull in the most recent activity. This is useful after sending a batch of Quick Requests or running a campaign, when you want to confirm the sends have been logged.
Now that you know how to read your activity history, here are a few related articles to help you get more from your outreach:
How to set up Auto-Send for review requests — learn how Quick Requests can be triggered automatically
How to set up auto-campaigns for review requests — understand how Campaign entries appear in your history
How to configure AI Agent response settings — explore the AI Agent tab activity in more depth
